Working with Form block
You might create a Form block to get more information about your customers when registering. In the FORM block, you can create a contact, order or other forms. It is a crucial feature when communicating with your customers.
In this article:
- create a new form block
- add all necessary fields
- learn what does the fields mean
- use Captcha
- set up the message for submitting the online form
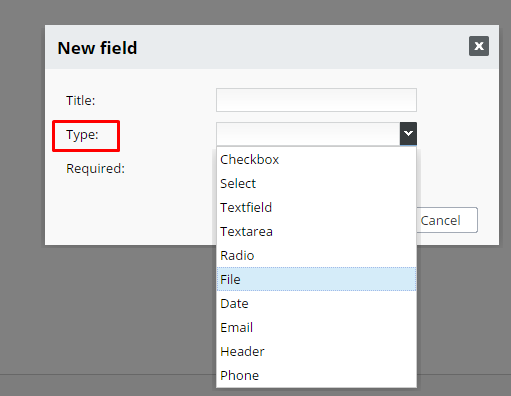
When creating a Form block, you can use different fields:
Header - title for Form block
E-mail - user can not send form without valid email address
Short text- Textfield, use for a name, surname, phone number ...
Long text- Textarea, works for longer text for example address, additional information or admin notes.
Select menu- Select, works for multiple options to choose for example payment methods. A customer has to click on the field form and the list of options is drop-down.
Checkbox- use in a case, you would like show all your selected options. The user can choose more options at once. For example, when ordering more services, you offer.
Radio button- works like a checkbox, with a slight difference. Select button is rounded and not square and the visitor can choose just one option from the menu.
Date- works fine for setting up the meeting (schedule), deadlines for projects etc.
File- user can attach a file or documents with your form (max. 20 MB).
Different type of fields:
How does it look like on your page
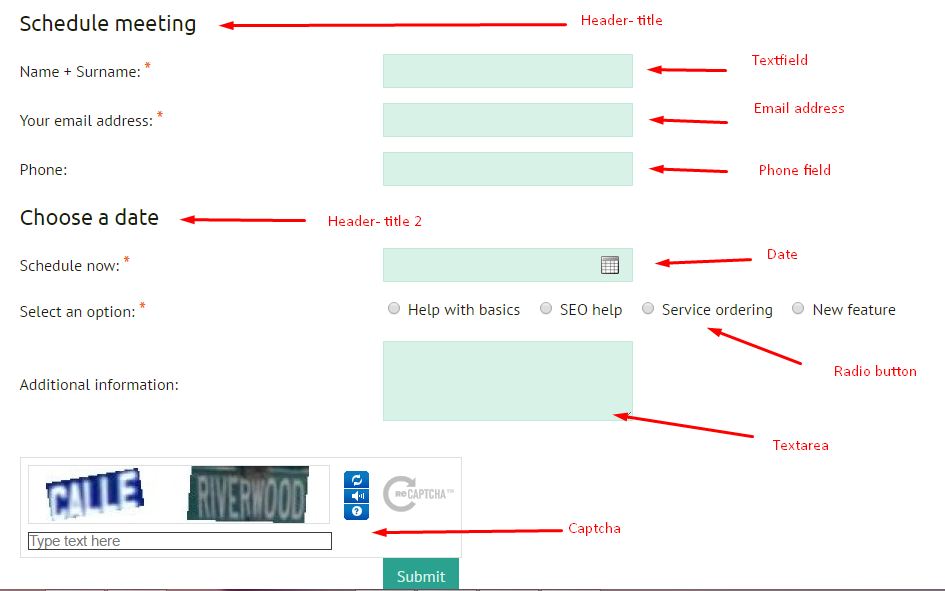
Possibility to set up all fields as mandatory fields. We recommend to set up required fields for name and surname, phone and email address.
Process of creating a block Form:
- In section, PAGES choose a page or create one for new block Form.
- Click on the New Form icon (top right corner) and SAVE. New window is open as Edit Form.
- By clicking on the "Add field to form" icon add each field into your form.
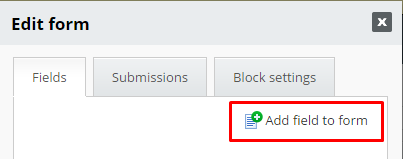
Fulfil the field name, type and select a required fields if needed. Continue and create all field you need to.
In your admin section looks like this
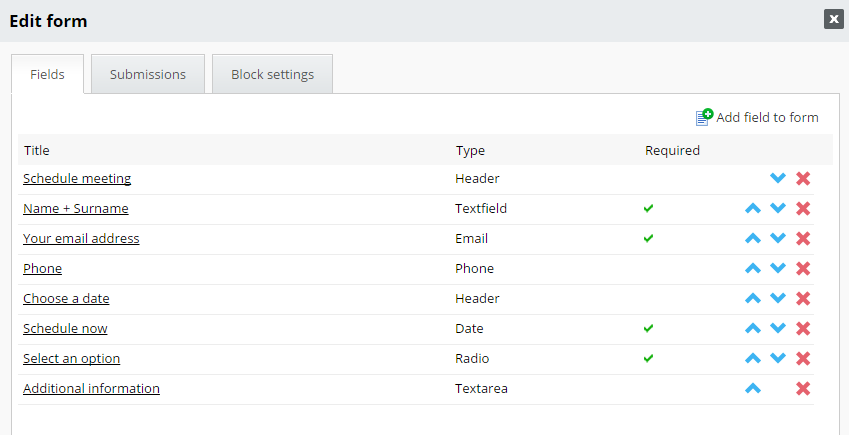
With darts (right column) change a fields order or delete with red cross the ones you do not need.
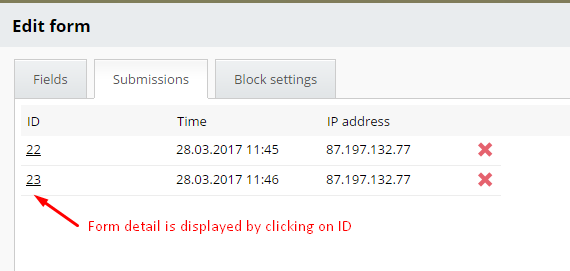
Part of the form block is an archive with subscribed forms in tab Submissions. Number of submitted forms can be edited by deleting not suitable ones.
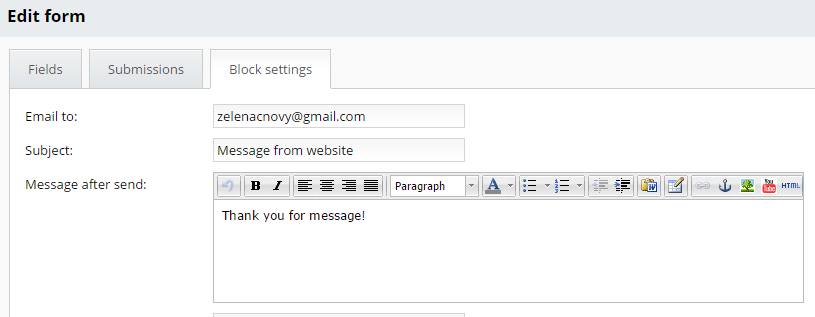
In the tab, Block settings fill in your email address. Immediately as your website visitor sends a form, the email address is notified with the content of submitted form.
We recommend to set up the email address of your domain (meeting@yourdomain.com)
In a case, you use free email hosting like GMAIL, we can not guarantee for 100% how does the system works as the settings are different for emails created with BizWebs.
As Subject specify the phrase, you would like to insert as an email subject, for example, Message from the website.
In text field "Message after send" fill in the extra text message. The message displays on your website after the form is sent for example: Thank you for your message!
As you check the field Captcha, new feature is added at the end of your form so-called captcha. It is a security mechanism, anti-spam protection. The humans can fill in captcha but the robot doesn´t.
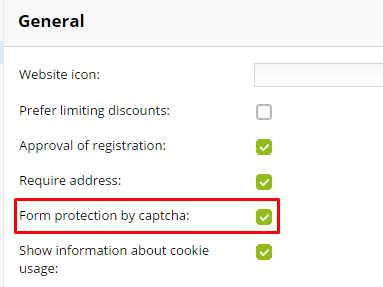
Set up your Captcha for each form separately or globally in section SETTINGS / General / "Form protection by captcha.
Message with filled form is sent to your email address and user address if you check the field "Send email to user".
In a case, you would like to edit form template, you can do it in section SETTINGS / Texts and templates / Predefined templates
Form block is easy to manage as other website blocks, you can relocate the block or copy the block on other pages, or set up the block as global for the whole website.


